Monday, February 22, 2010

Zutter BIA and 'How to Make A Man Happy'


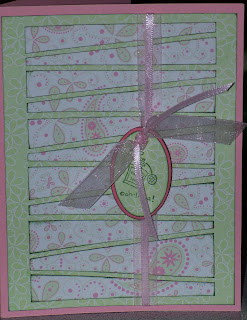
If you look closely at the above photo you can see how the plate (on the left) is not straight
The screw that is in that plate is also bent
the little tab (in about the centre of the machine) is also not right. When I lined up paper to punch the next set of holes and to use the tab I ended up not using it, just eyeballing the page because the tab raised my page at the far end - so I guess the tab is positioned too low?


My DH got me a Bind-it-all for Christmas, he had to order it special all the way from BC since there were none in our neck of the woods at the time (we are in Ontario)
Well I used it for the first time a few weeks ago. Things seemed a bit off, but I was not too sure.
I used it again the other week to make my DD a school Day Planner
This time I knew something was wrong.
I called Zutter and today they called me back
After a long conversation and a few tests performed by yours truly they asked me to find a mailing estimate to send it back to them.
DH then figured it all out and I sent off the mail
They then asked us to destroy the BIA by drilling holes into it and once they had proof they would send me a replacement Bia
Too bad I didn't tell them about the wires I had ruined on my way to figuring out something was wrong with my machine

To make a man happy -
Tell him to go drill holes in the present he bought you for Christmas!
My DH was beaming (I really mean BEAMING) when he came in from drilling the holes.
You would think I never let him destroy personal property or something - oh wait, why would he destroy property? Not like he is a ten year old boy with low morals

Friday, February 12, 2010

Company's Coming Card Three


^ inside the card

This one is from further in the book.
It was supposed to be an Easter card but somewhere along the way I felt it was just too summery looking.
Sentiment stamp from Anna Griffin
Flower stamp from Stampin' Up
Sizzix flower button dies
Flower punch
This was my first time ever using the magic mesh! I have so much of it, many different colours but never could find a use for it. I love the way it helps the paper boarder pop and look more ribbony. The original card had no ribbon so I tried that too.

Thursday, February 11, 2010

Second Second Company's Coming Card


I wanted to make a card today and this card was so quick and easy to make the other day I decided to make it again using different colours.
Tag is made from a Sizzix tag die
Ribbon is Stampin' Up and the thin one is a cheapie one
Stamp from Stampin' Up

What version do you like better?
What direction do you think this card looks best? It is so easy to change the direction by turning the tag

Valentine Boxes


Years ago I bought a bunch of boxes from Stampin Up. These were on a 12x12 page and had 1-3 each. I wanted to send Valentines in for my son since this is his last year of school (he graduates this year) and wanted to help make it special for those he will leave behind.
the boxes were on plain whisper white so I decorated them with stamps and then closed the one direction, put a little piece of vinyl (left over sticker) to help keep it sealed, held one end closed and filled with conversation hearts then closed it up, and tied a 12 inch red curling ribbon onto a tag and the box and curled it and voila! Easy Peasy Valentine's for my sons class. This was easy to do last minute since there are only ten kids in his class, including him! So I only had to make 9 boxes. I was going to make one for the teacher and EA's and assistants and anyone else involved but there were just too many to count, so I kept it simple to the kids only.

Wednesday, February 10, 2010

Second Company's Coming Card


I did finish this yesterday but forgot to post it
I used paper from SEI Chickadee Collection - love this paper!
I did not have a 'thinking of you' stamp small enough to use in the tag so I just winged it with a tiny flower stamp from Stampin' Up. (Consultant collection Small Talk)
Ribbon from Hobby Lobby

I am making Valentine's for my kids to hand out so I doubt I will get a card made today, at least I have yesterdays to post eh!!

Monday, February 8, 2010

Crocheted Hanging Towel


The towel as it looks hanging from my stove handle. Nice and long! Love it!


The above loop is where the towel was started.
I copied the 'Irish Rose' from somewhere on the net, but didn't like how it was turning out so ended up modifying it.


A close up of the Irsih Rose above

I have wanted to make one of these towels in forever. I was given one years ago as a gift and I just loved it so much we used it to death! Then I was given another one as a gift and same thing happened to it. Then I wondered why I didn't make one for myself instead of asking for another. Finally I plucked up the courage on Friday and started it. I looked everywhere for a good pattern and hated them all.
I used a doupble ball of the stripes cotton yarn
So here is my pattern:
Chain (c) 12
Slip stitch (ss) in first link to form loop
single crochet (sc) twice in each chain. ss in first sc
c 1, sc in next 5 from loop
*turn, c 1, sc in the 5
*repeat this for as long as you want your hanging loop to be (take it to your stove or where it will hang and measure)
This next part I would modify if I made this towel again and make it a bit wider, but I will give you what I actually did do

c 5, triple crochet (tc) 2 times in same space. tc 3 time in each space till end of row. turn
c 5, tc in same, tc 2 times in each till end of row. turn
c 1, sc in next, 'c 2, skip one (from below) sc' repeat to near end then make sure you can do two sc in last two spaces
I repeated this till the ball of yarn was nearly gone.

then I found the other end of yarn and created the 'Irish Rose'
I will not give the pattern for it but you can create anything for your towel, even use a button, or look for a free pattern online.
This is the pattern that inspired me

once my rose was finished I went back to the towel which was not done yet and finished it till the ball of yarn was to short to complete one more row. I fastened off, sewed the rose on and took pics then hung it on my stove where it has resided all weekend!

PS: If you do make this towel from my instructions, go ahead and take all the glory you want. Say you designed it or whatever, but please please please leave me a comment to let me know you could understand my instructions. You could even leave me a link of a pic of your towel. This would help me to know that these were not just for me!
I plan on making it again, so keep an eye out here for the newer towel, hopefully even better. (maybe I will even figure out how to write the instructions clearer!)

Company's Coming Crafts Card Making Challenge Day One


Last year my brother surprised me for no reason with this book. I looked it over and as much as it was nice I didn't think I would ever really have a reason for all those cards. Plus they were not my style.
Then this weekend I was looking through it again and decided why not make every card in the book? So for anyone who has this book please join me in this journey. For copywrite reasons I will not be able to post the original picture or instructions.
I will do my best to copy the cards as close as possible.
My goal is at the end of the book I will have grown as a card maker and will once again be able to design my own. I have lost my mojo. I keep trying but it is not coming back to me.
I will list the page the card came from and post the picture of my version.
I also do plan to use the Cricut as much as possible on each card.

Today's card is the first one in the book.
Page ten and eleven.
Hello and brackets from Designer Calendar
Quotes from Plantin Schoolbook
I did not have a one inch circle and I did not want to change paper 21 times on the Cricut, so I found a 1 inch flower punch and used that.
Paper is from The Slab III
The brown paper for the cut outs was from my scrap pile.
Edges inked with Stampin Up Close To Cocoa

Wednesday, February 3, 2010

Kevin's Mom's Birthday Card


What do you get when you are in your craft room and your Cricut is downstairs and you are being too lazy to go down and use it?

You get this beautiful card!
Yes. You do see Cricut cuts on it. They are from A Child's Year.

So this card started like this, sitting in y craft room, knowing I need to make a birthday card and not really wanting to get out the Cricut. So I grab this wonderful double sided paper and cut it in half and score it. Then I get out a birthday stamp (Stampin' Up) and stamp it on scrap paper, it matches the card well enough eh! Then I inked the edges. found another matching scrap, layered it, found some scrap mulberry, wet it down to iron it out and tear it. glue these bits together. I found an old charm from a kit I bought years ago and could not find a brad (which is odd since I have like a million of them!) so I notice these safety pins I got on sale in the scrap aisle and voila! Notice it is still missing something, so grab a left over pice of the card paper and cut it down to size and then use my Martha Stewart punches (first time ever on a real project!) but didn't cut to the right size so could not punch the sides.
Then I ink it so it stands out.

This is where I stopped being lazy!
Found two pieces of matching cardstock for the bottom half of the card.
wanted to try out my new Cuttlebug machine and folders, so embossed it. The folder is only 5 inches, the card is 6 inches, so I flip the thing over and put it through again. Yikes! It erased two rows of dots! What to do? Use ribbon! Ribbon solves so many mistakes eh?
then I notice it is too far from the side where I usually put my ribbon. So after much searching through Design Studio (I love that program) I come up with the idea of using the A child's Year. I cut 4 ice cream cones, 3 children and two girls.
Ended up not using two ice creams, otherwise used up everything that I cut!
Everything was layered onto pop dots for dimension. I tried taking one pic showing the layers a bit more. I know sometimes it helps when you can really see how a card came together.

So yes, this was an awful long story. I really wanted to show the thought proccess that sometimes goes into making a gorgeous card. This was an evolution. A true growth.
Thank you for reading my story.
Good luck with your next craft project.
PS: This card took me from 2 PM to 7 PM to make - with a few breaks in between.

Mileage Book


DH needed a new mileage book for work. He had used just regular little spiral notebooks in the past, the tiny ones that fit in your pocket, but it wasn't quite what he needed. He had been saying how he needed to make one just for him, and my getting the Bind-It-All for Christmas inspired us to make this. He designed the pages and then printed them out on the puter and I designed the book.
The front and back covers are made of a piece of cardboard. In fact, the piece of cardboard that comes with a paper pack! I cut 4 to size, to match the pages, which were 1/4 of a whole page. Then I glued two together for the extra sturdiness. Let it dry while under heavy objects.
I inked the edges and all the sides of the covers with Eggplant from Stampin' Up.
I cut the car and word with my cricut and glued them on with Mod Podge and then sealed it about 5 times.
This book is going to go through a lot of punishement and I really wanted it to last. My husdband thinks it should last him about a year. Maybe I will remember to take a pic of it when it is full (empty) to see how well it lasted eh!